Rather than using Photoshop filters to create a watercolour or painterly effect, you can use the Art History Brush in Photoshop to create a nice looking "painting." And it will make you feel like you’re part of the process of making something because with this tool you need to make decisions about how the effect will look.
STEP 1
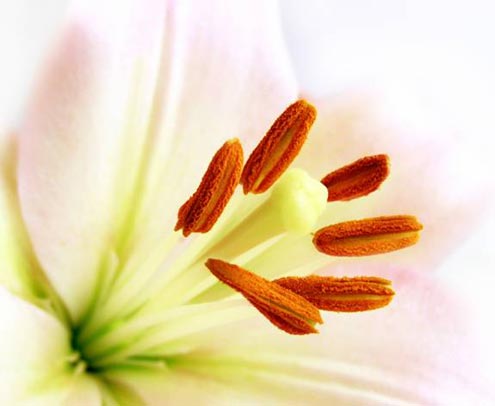
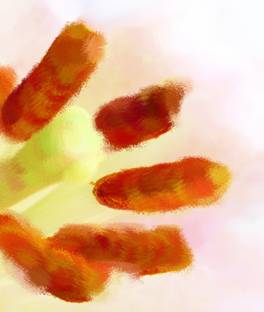
Start by opening the image you want to paint in Photoshop. I’m using this close up of a flower. This is a large, high resolution image.
STEP 2
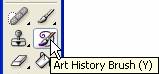
Select the Art History brush from the toolbox. It may be hidden underneath the History Brush.
STEP 3
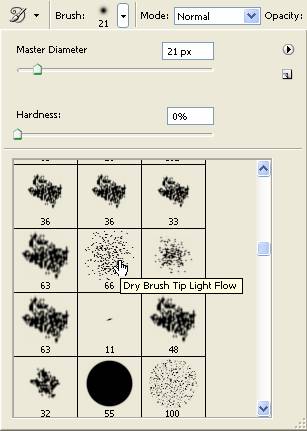
On the tool options bar, click on the Brush options. Choose a “Dry Brush Tip Light Flow” brush from the list of brushes available. Depending on the size of your image you may need to change it from the default of 66 pixels. For this image, I’m going to leave the brush size as 66 pixels.
STEP 4
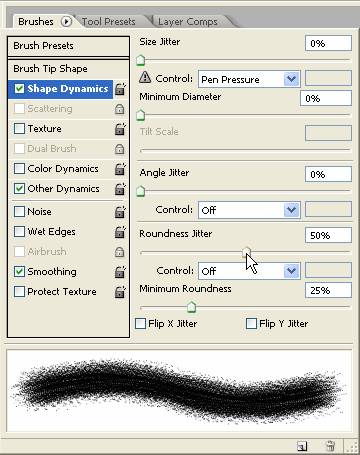
Open the brushes palette and click on the Shape Dynamics under Brush Tip Shape.
STEP 5
Drag the Roundness Jitter to about 50%
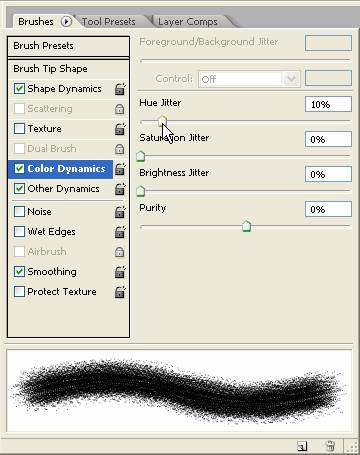
STEP 6
Click on the Color Dynamics. Drag the Hue Jitter to about 10%. That’s all the brush adjustments that we need to make.
STEP 7
On the Tool Options bar, set the style of the Art History Brush to Tight Short. (You may want to try out different styles depending on the effect you want to achieve). Set the area to 50 pixels.
![]()
STEP 8
Start painting on the image. It’s a good idea to paint over large areas of similar colour to get a feel for how the art history brush works.
STEP 9
Continue painting into the more detailed areas of the image. Reduce the brush size where required on the intricate areas.
STEP 10
Keep working on the image until you have painted the whole area and you have what should look like a nicely painted watercolour image.

Using Photoshop's Art History Brush To Create A Painting Effect
Labels: Photoshop
Subscribe to:
Post Comments (Atom)

0 comments:
Post a Comment