There are times when you need to put a title on an image, whether for print work or for the web. Sometimes you might put it above the image, often you might place it below the image, but one way to add a nice elegant title is to actually put it in the image. In this short tutorial I'm going to use Photoshop to do just that.
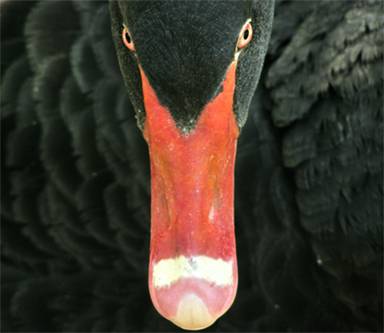
I'm going to start with a nice pic of a black swan – taken by “bradimarte” and available for free download from Stock.Xchng. I cropped this image a little bit tighter than the original.
Step 1
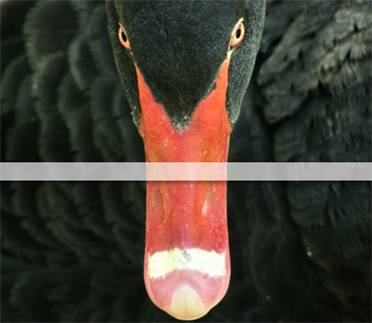
Use the rectangular marquee to draw a fairly thin rectangle, the full width of the image.
Step 2
Create a new layer and fill the marquee with white.

Step 3
Reduce the opacity of the white line layer to 65%.
Step 4
Click on the New Layer Style button at the bottom of the Layers Palette and choose Drop Shadow. Add a fairly faint drop shadow (I set opacity to 50% and Distance and Size to 5 px). Click OK.
Step 5
Select the Type tool and pick a Serif style font. Add some text. I picked the Trajan Pro font, which consists of all uppercase letters. I used #333333, which is a dark grey and a font size which sat comfortably in the middle of the white line with lots of breathing space above and below.
Step 6
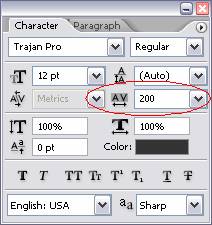
With the Type tool still selected, choose Window > Character to open up the Character palette.
Step 7
In order to make your text spread widely across the white line, change the tracking to 200. This will put space in between each of the letters.

And that completes the image and title.
Use Photoshop To Add A Title To An Image - Photoshop Tutorial
Labels: Photoshop
Subscribe to:
Post Comments (Atom)

0 comments:
Post a Comment