In Photoshop, you will often use point type - a few discrete words or lines – which are added by clicking once with the Type tool and then adding some text. Often, however, a design may call for full paragraphs of text. You can design complete paragraphs of type in Photoshop and you don't have to switch to page-layout program to get paragraph type control. In this short tutorial I'll show you how to do it.
Step 1
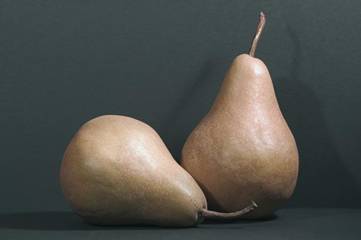
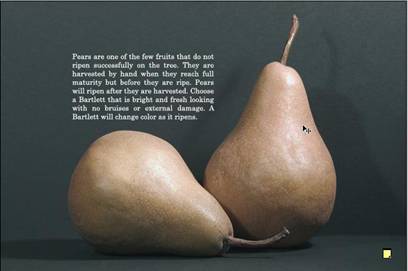
Open or create an image that you want to add a paragraph of text to. I'm using this picture of a couple of pears.
Step 2
Select the Horizontal Type tool (), and in the Character palette, choose a typeface. I'm using Century, I've set the Size to 12 points, Leading to Auto, Tracking to 0, and text Colour to white.

Step 3
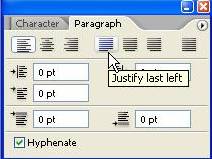
Click the Paragraph tab to bring the Paragraph palette forward, and click the Justify Last Left button.
Step 4
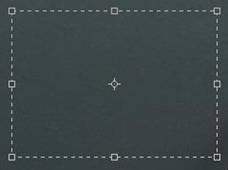
Select the Horizontal Type Tool from the toolbox and instead of just clicking once on the document window, click and drag out a rectangular marquee.
This creates a text box into which your text will flow.
You will notice a small flashing cursor inside the text box. Start typing in your text, or if you have copied some text from another document or web page, press Ctrl+V (windows) or Cmd + V (mac) to paste the text that you copied into the text box. Your text will now flow neatly from one side of the text box to the other, because you selected Justified from the paragraph palette.
Step 5
Once your text is in the text box, you can use the Move tool to drag the text to wherever you want on the image.
Designing With Paragraphs Of Type - Photoshop Tutorial - Type Tool Tips
Labels: Photoshop
Subscribe to:
Post Comments (Atom)

0 comments:
Post a Comment