1. Open the photo that you need to retouch in Photoshop.
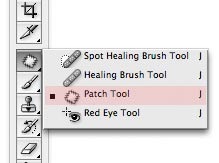
2. Select the Patch Tool, which lives on the same Toolbar square as the Healing Brush. You can right-click on that square to select the Patch Tool from the fly-out menu.
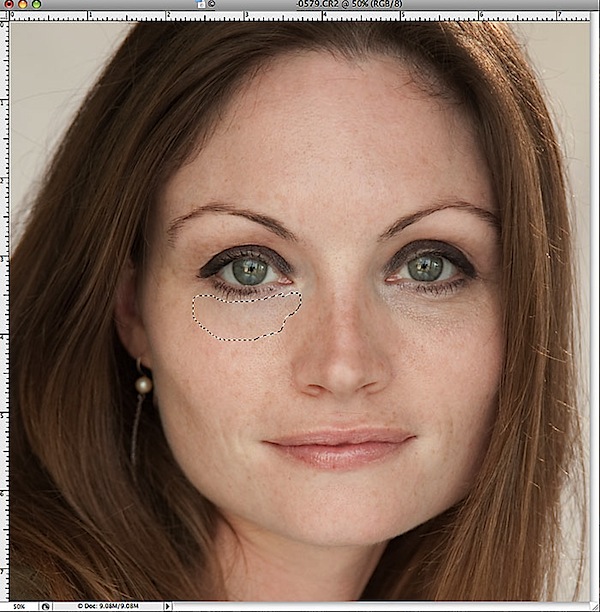
3. Using the patch tool, draw a closed loop around the area under the eye that you want to retouch. Be careful not to chop off the eyelashes.

4. Now that the loop is selected and surrounded by a dashed line, click inside it, and with the mouse button held down, drag that loop down onto the cheek of your subject. Drag it to an area of smooth, clean skin with good texture. This will be your sample area.

5. After dragging to a clean sample area, release the mouse button. Bang! Instantly the texture of the sampled area will be remapped onto the target area under the eye, smoothing out any bags and correcting the color of dark circles!
Somehow the wizards at Photoshop have programmed this thing to blend the texture of the sample area and the color of the target area in a way that looks totally natural (most of the time). Occasionally, you’ll find a face where it doesn’t work so well, but 90% of the time, this fix is all I need.
6. Deselect it by pressing Command-D (PC: Control-D) and check the results.
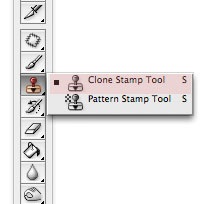
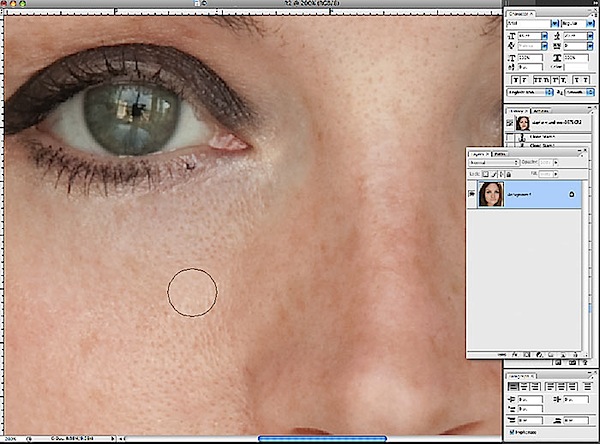
7. If there is a visible edge along the border of the patch, you can zoom in and do a little cleanup. Now is the time for the Clone Stamp tool. Adjust the opacity to about 30%, take a sample (Alt:Click) from clean skin near the edge of the patch, and then lightly clone along the borderline to smooth away any visible edge.
With practice, you’ll get skilled at drawing and sampling with the Patch tool so that edge touch-up is rarely necessary.
Then you’ll enjoy this as a fast, easy, one-step solution to most of your under-eye portrait problems!
The Fast Way to Remove Dark Circles Under Eyes in Photoshop
Labels: Photoshop
Subscribe to:
Post Comments (Atom)

0 comments:
Post a Comment